Bloodhound – Using Databases

In the following walkthrough we’ll show you how to use Bloodhound to turn a database into a data API. In this example, we will use the Bloodhound Template found on Github and use Postgres as the database. The template will deploy a Postgres database to experiment with, but you will obviously want to connect it to your database once you understand the mechanics.


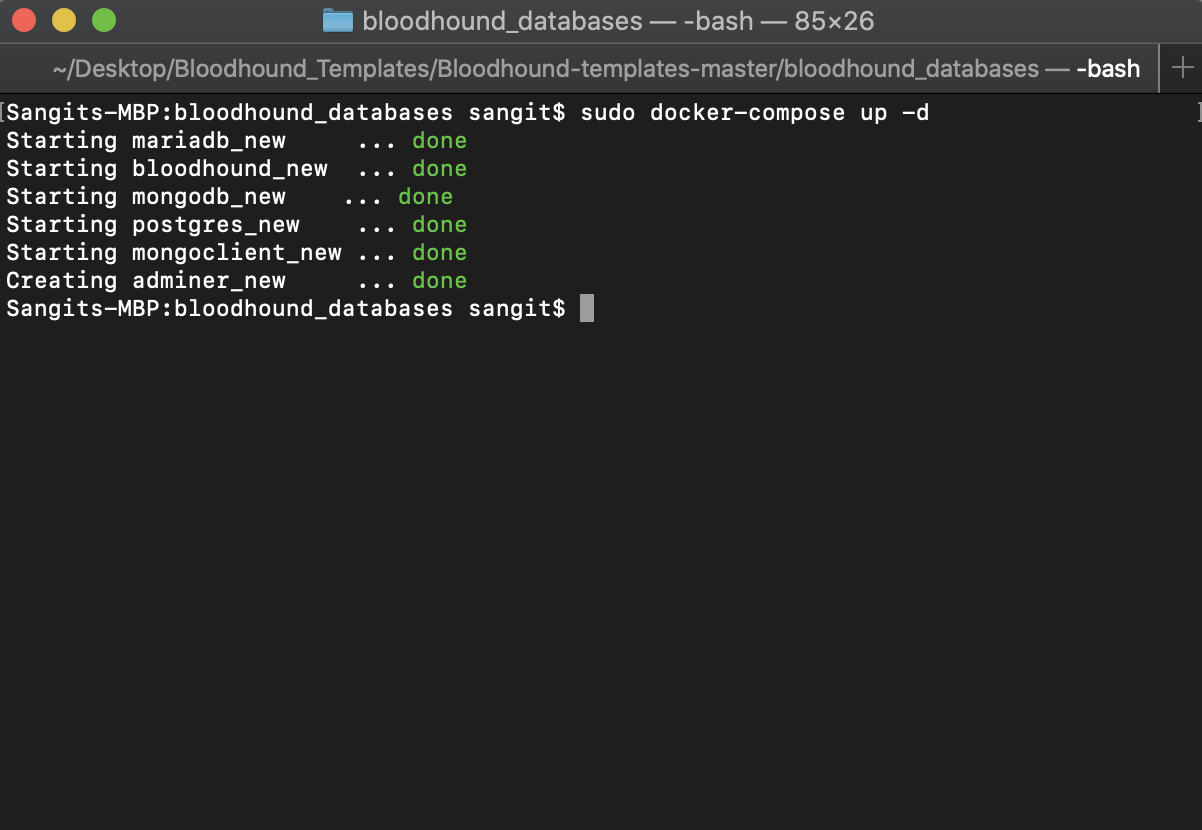
  • First, we deploy the entire package found in the templates folder. This will deploy Bloodhound as well as the databases.
    sudo docker-compose up -d
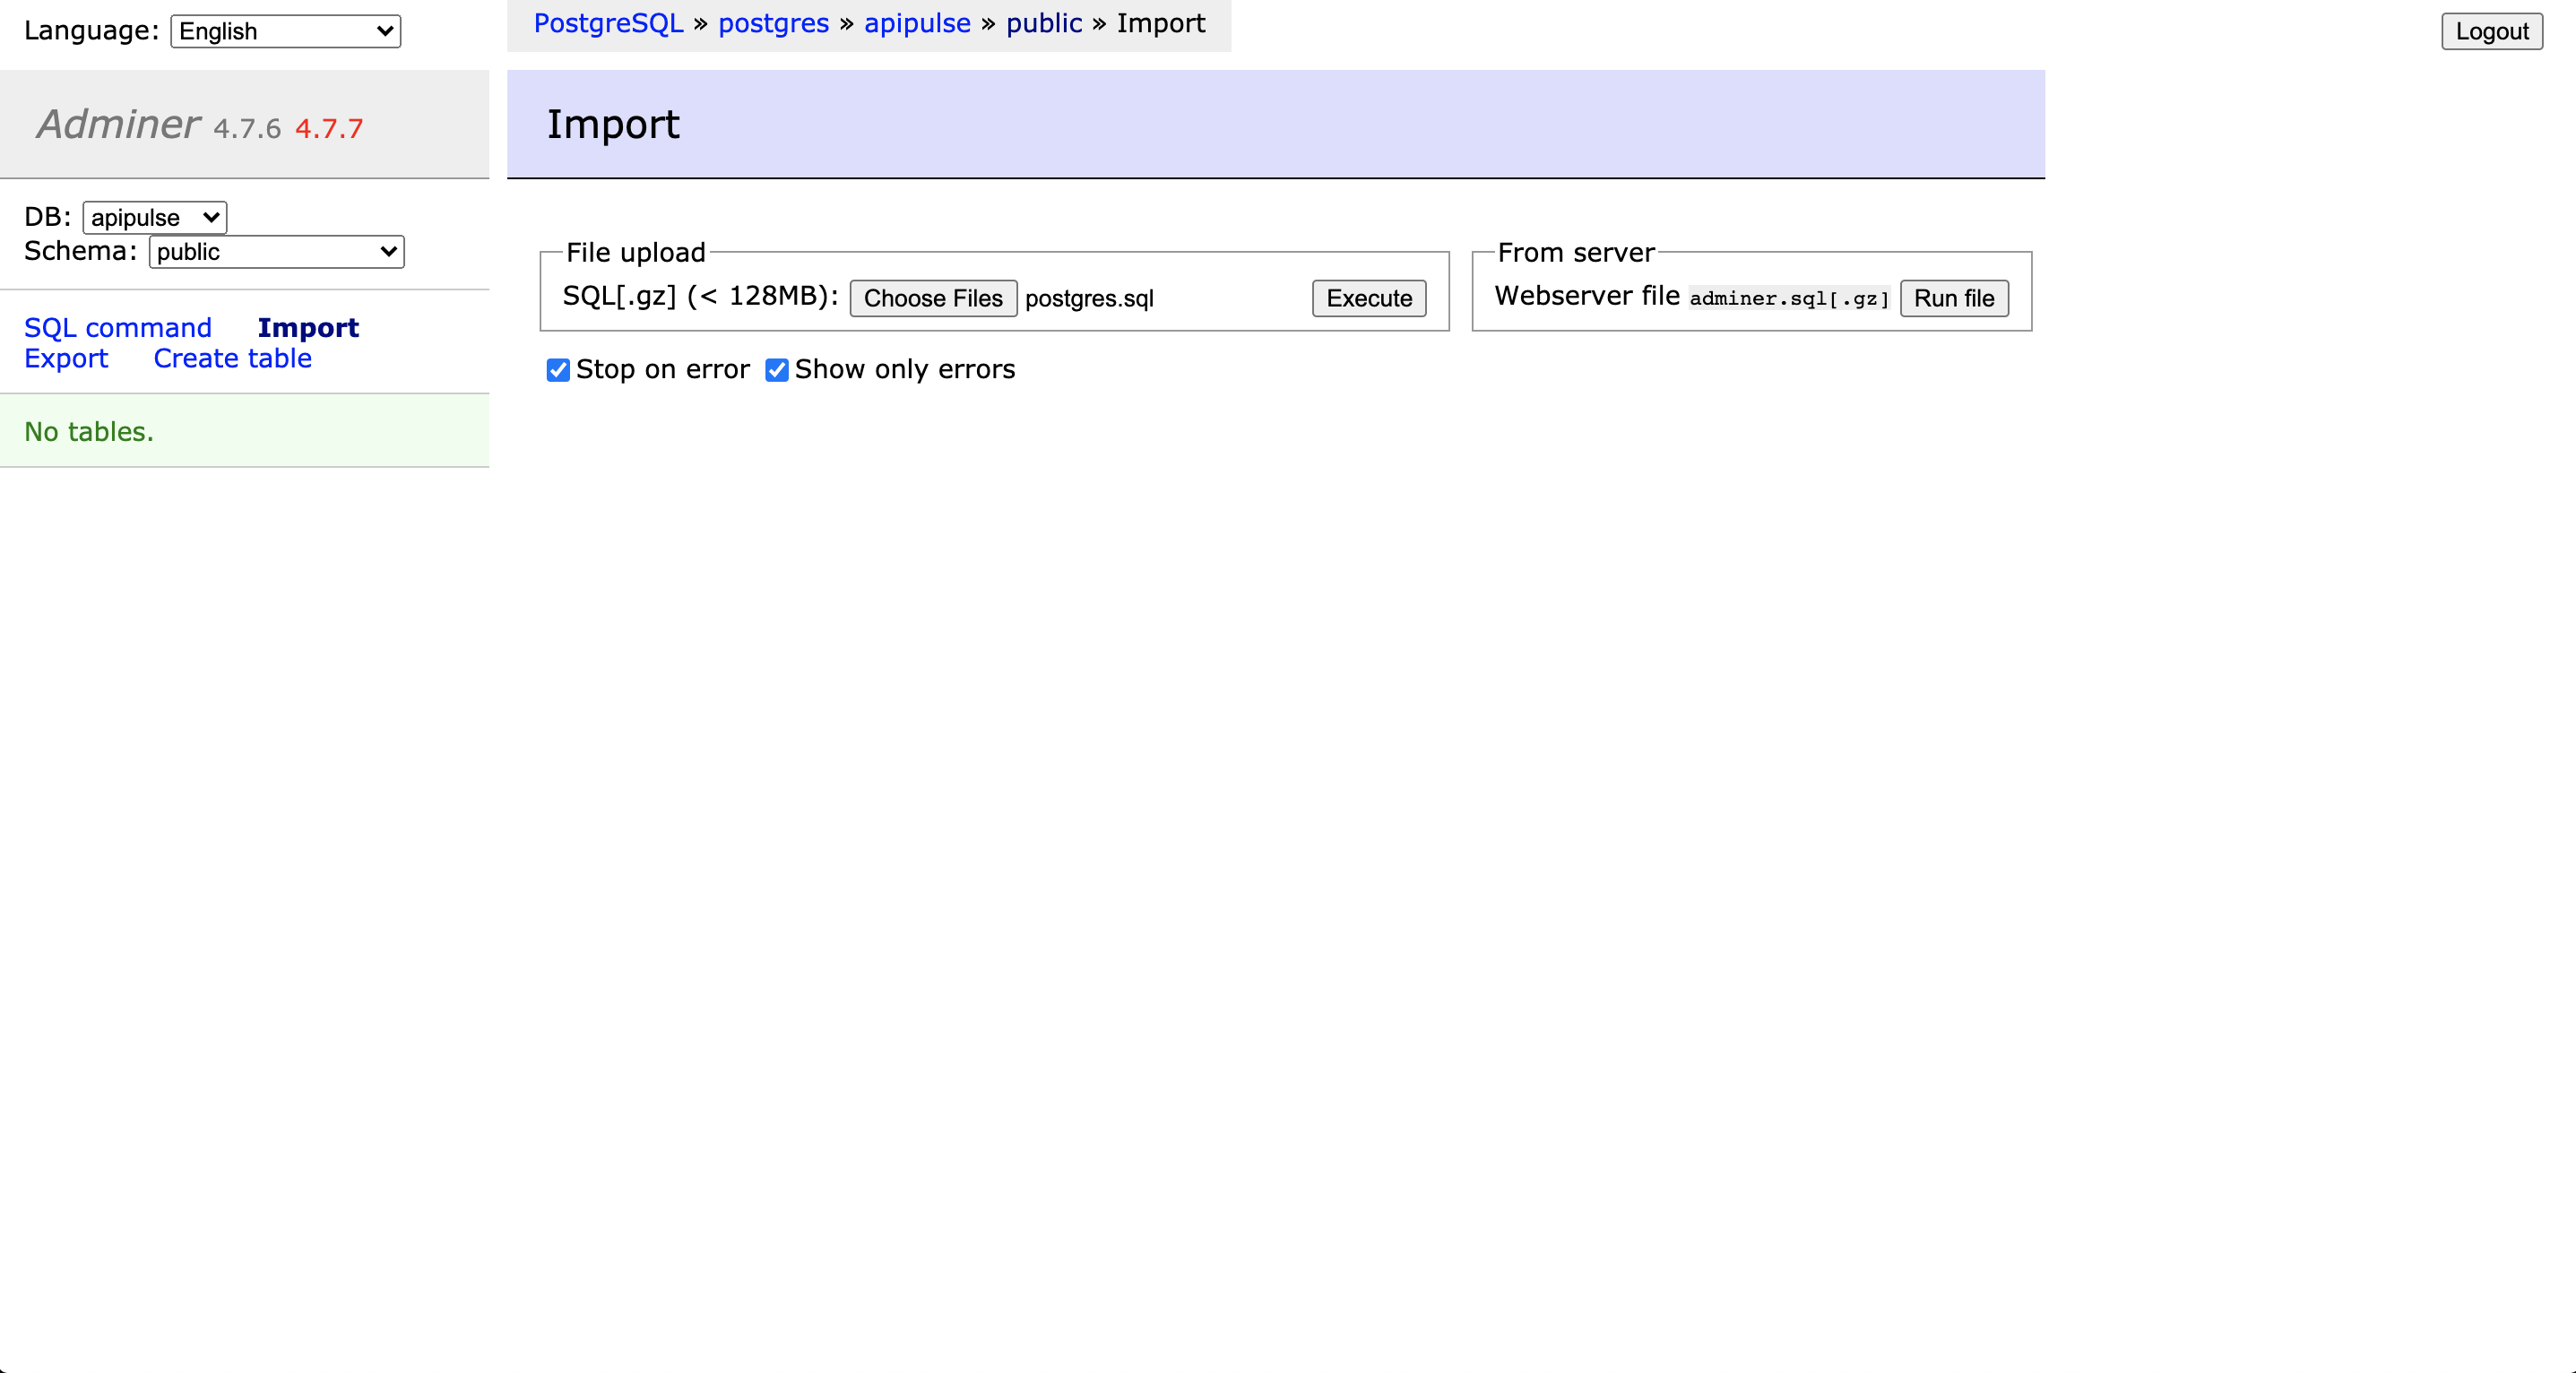
  • Next, to allow you to experiment with our demo setup, we will point our browser to “http://localhost:8081” and use the following settings:
    System: PostgreSQL
    Server: postgres
    Username: apipulse
    Password: jk5112
    Database: apipulse
    And load the test data in the UI.

    To do this we will click on “Import” and load the “postgres.sql” file and click on “Execute” (note: this will throw an error but it has no effect)
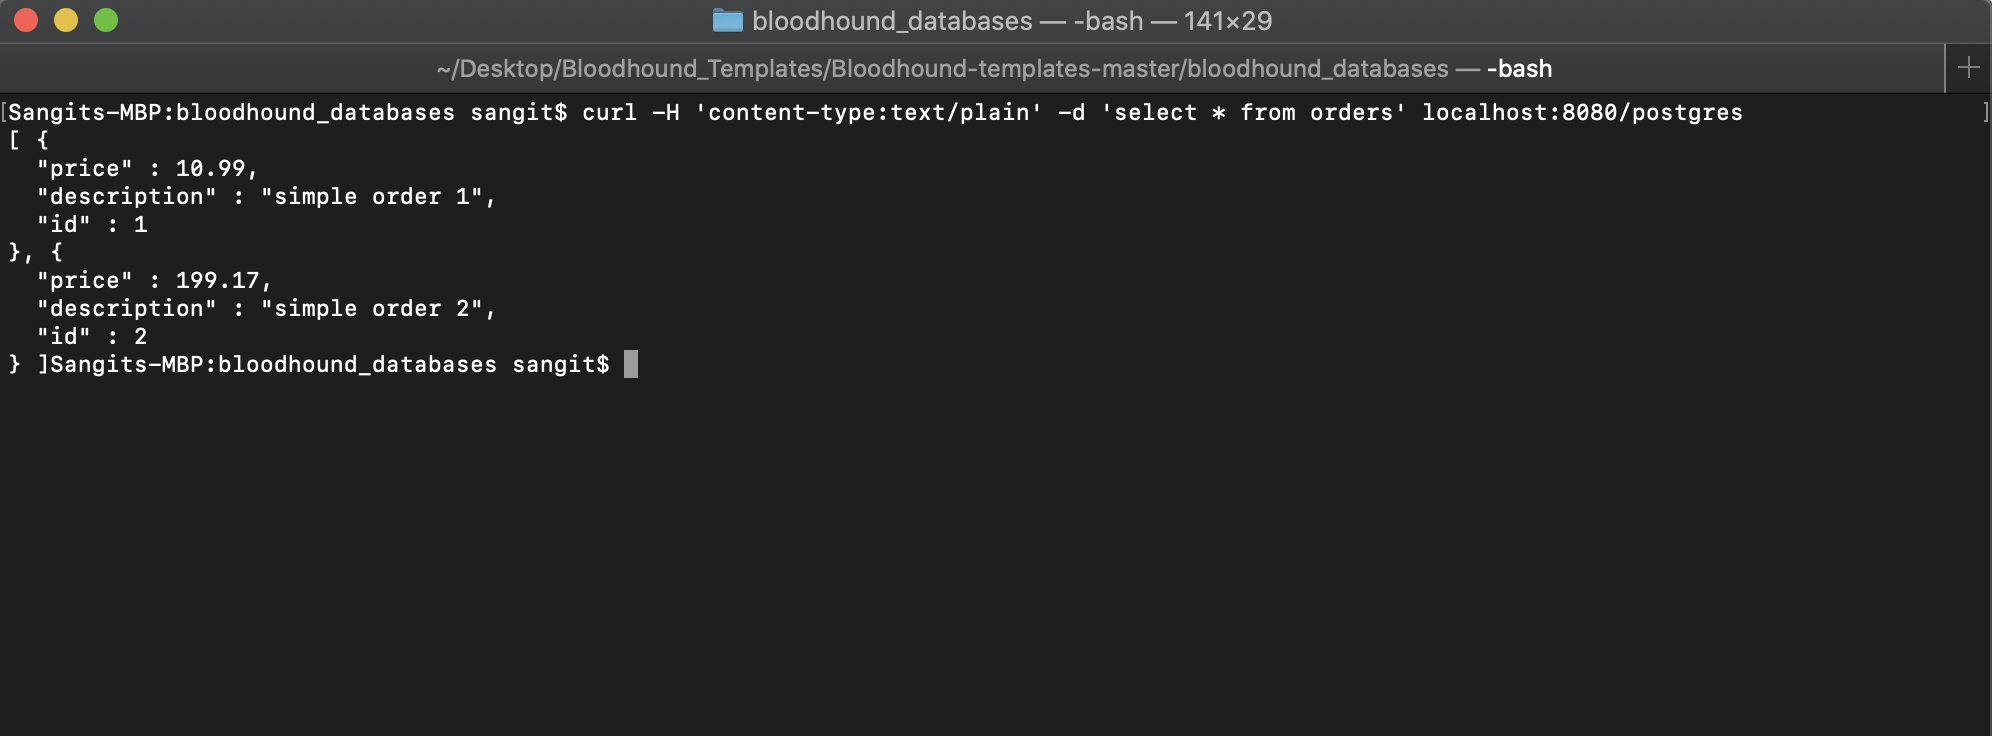
  • Now that we have our database populated with test data, we can query it using the API “localhost:8080/postgres.” Let’s try a “select” query. We will execute the following curl command “curl -H ‘content-type:text/plain’ -d ‘select * from orders’ localhost:8080/postgres

  • All of the other query operations are also supported via the API call localhost:8080/postgres, which can be the first step in your data-driven multi
  • -step API test. Use this API in your automated API testing suite.
  • As mentioned in the beginning, once you understand the mechanics you can configure the module to connect to your jdbc databases by modifying the flow yaml. You can learn more about the module and it’s configurations here.
  • Visit the Bloodhound Wiki to learn about configuration options.

Bloodhound – Forward Calls to APIF Logger

One of the main reason for the existence of Bloodhound is providing a good way to forward API conversations to other agents. This example demonstrates how this happens using the FortressForwarder module that can be found on GitHub.

While you can find an example of how to forward the API conversations to requestbin here and can certainly modify this to forward to many other locations including Elastic, Splunk, and many more. The example below will show you how to configure the side car to forward the calls to the API Fortress Logger.

Configuration

Once you have downloaded the template on our Github, navigate to the “etc” directory and then to the “flows” directory. We will be modifying the “default.yml” file, there is a sidecar configured for requestbin you can replace that with the configuration below:

sidecar/fortress_forwarder:
config:
url: ""
headers:
x-api-key:
x-secret:
discard_request_headers:
- connection
- accept-encoding

Let’s walk through what needs to go into the values:

  • url – “https://{yourAPIFortressDomian}.com/app/api/rest/v3/{CompanyID}/liveLogs/push/raw”

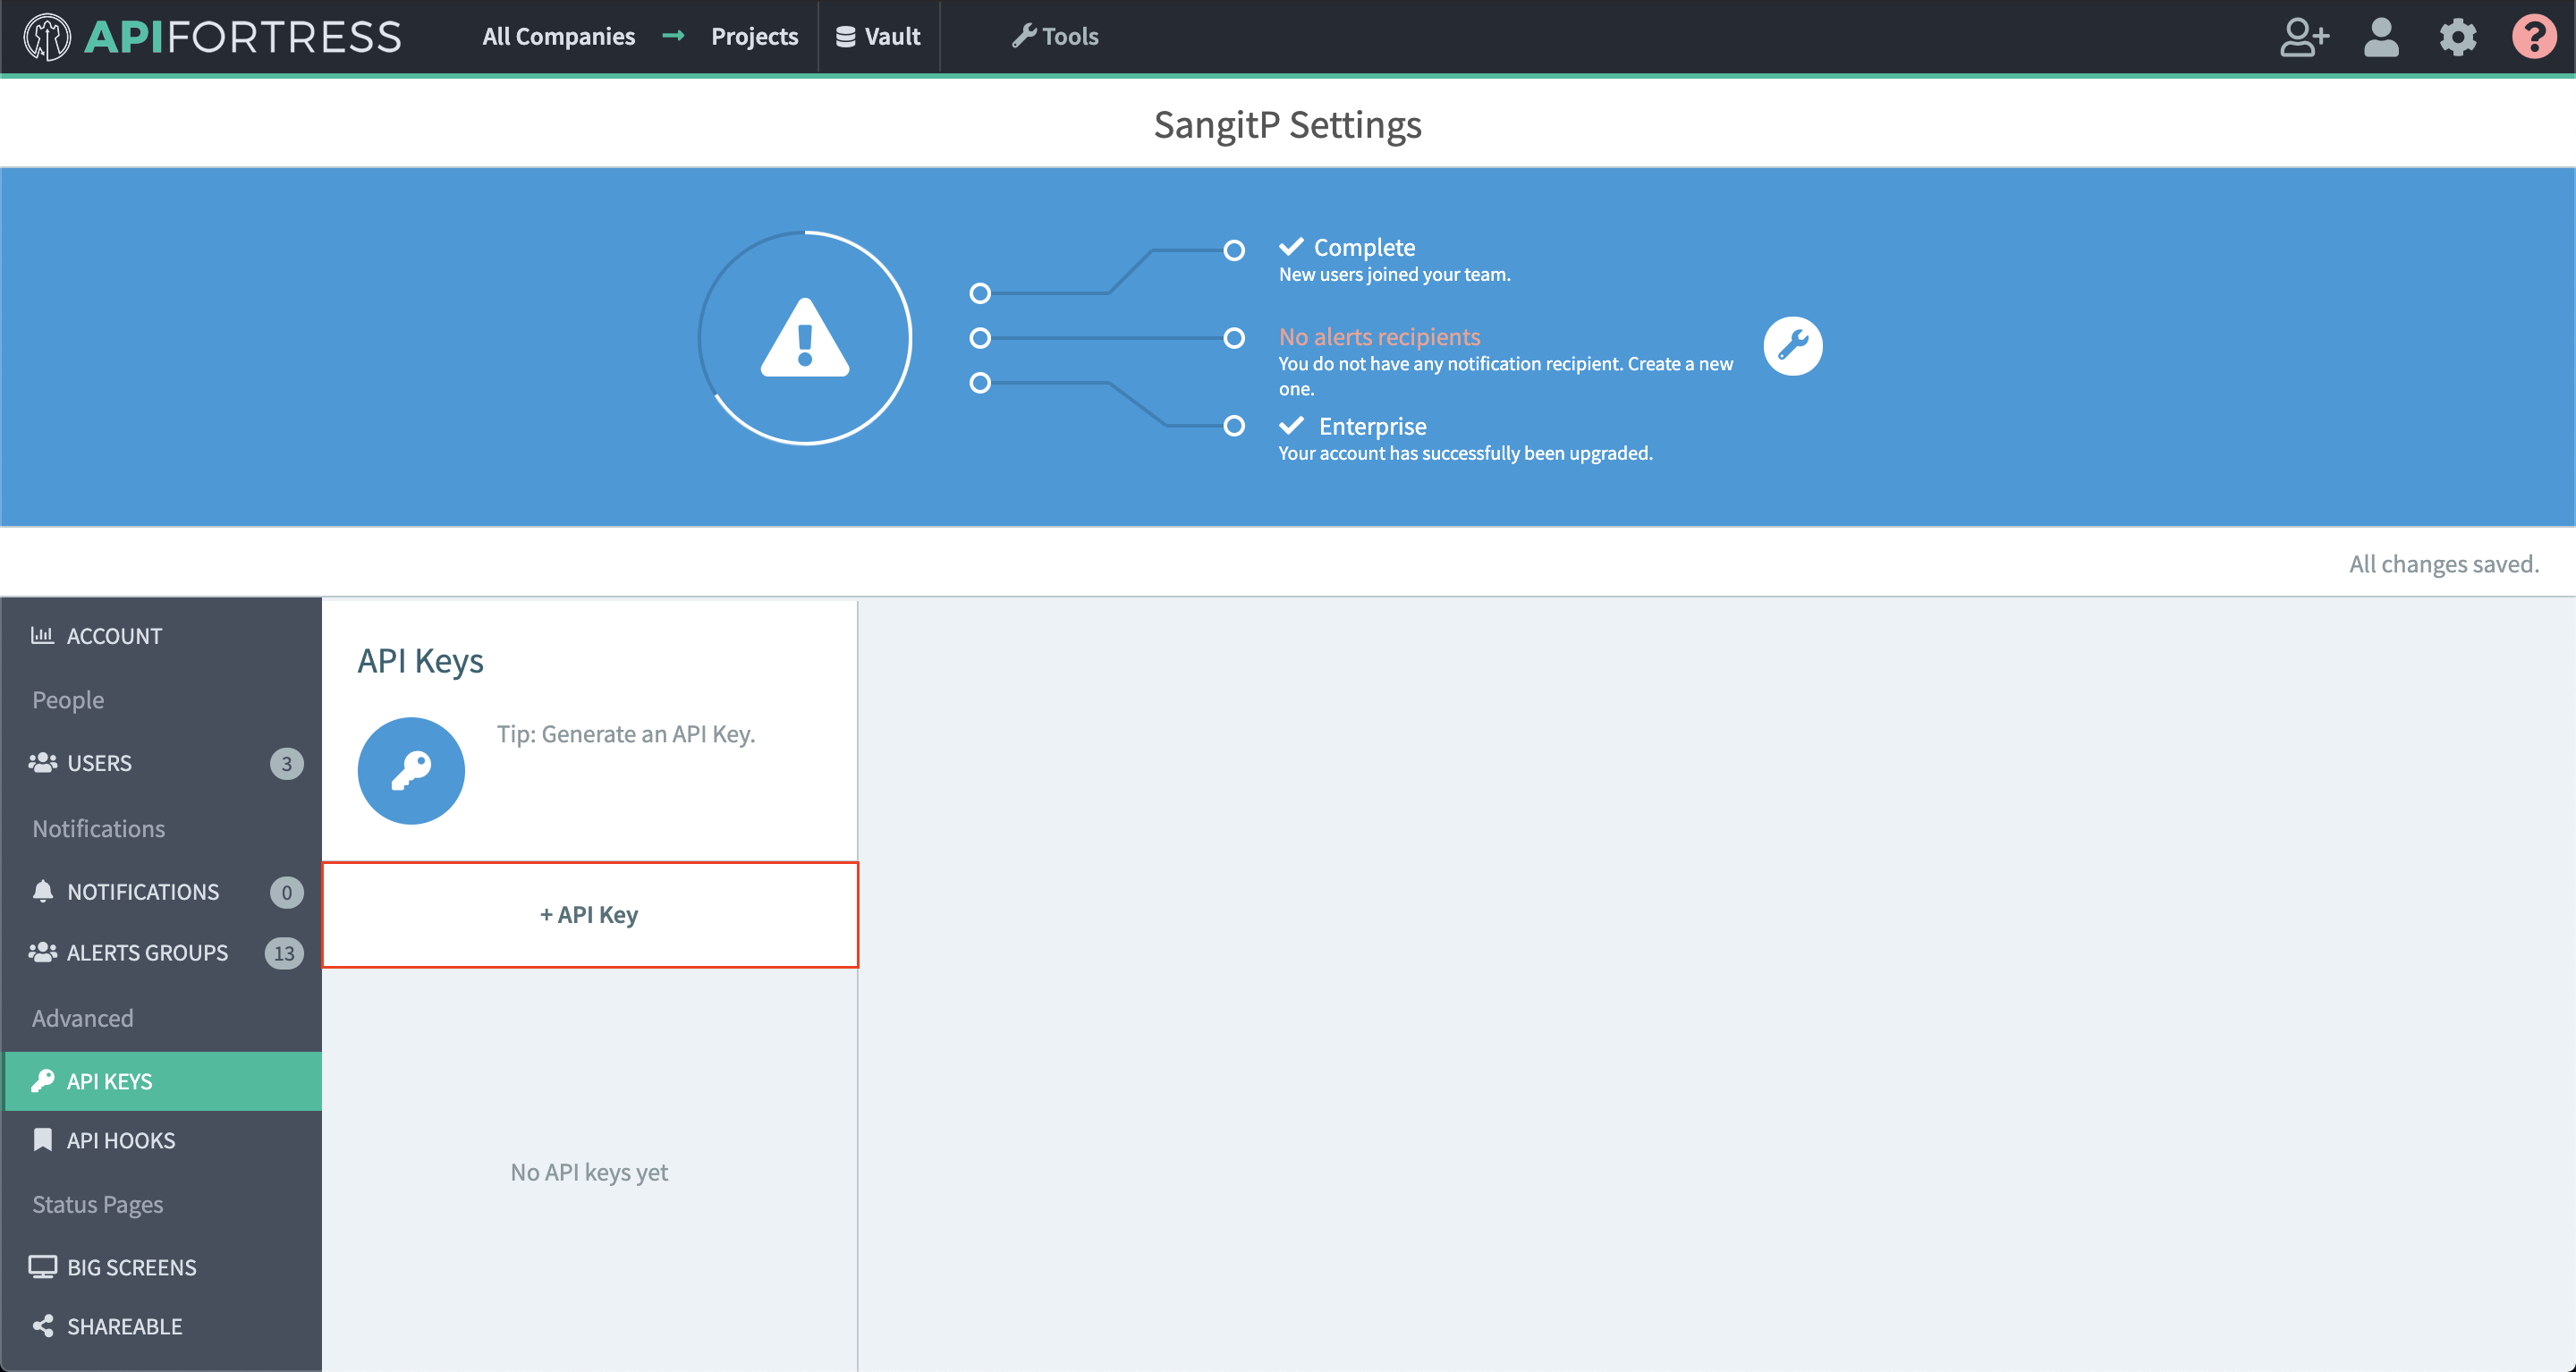
  • x-api-key and x-secret – can be generated in API Fortress in the “Company Settings -> API KEYS”

Usage

The docker-compose comes with Bloodhound. In the default settings, Bloodhound will proxy a demo API.

  1. Start the full package by issuing docker-compose up -d
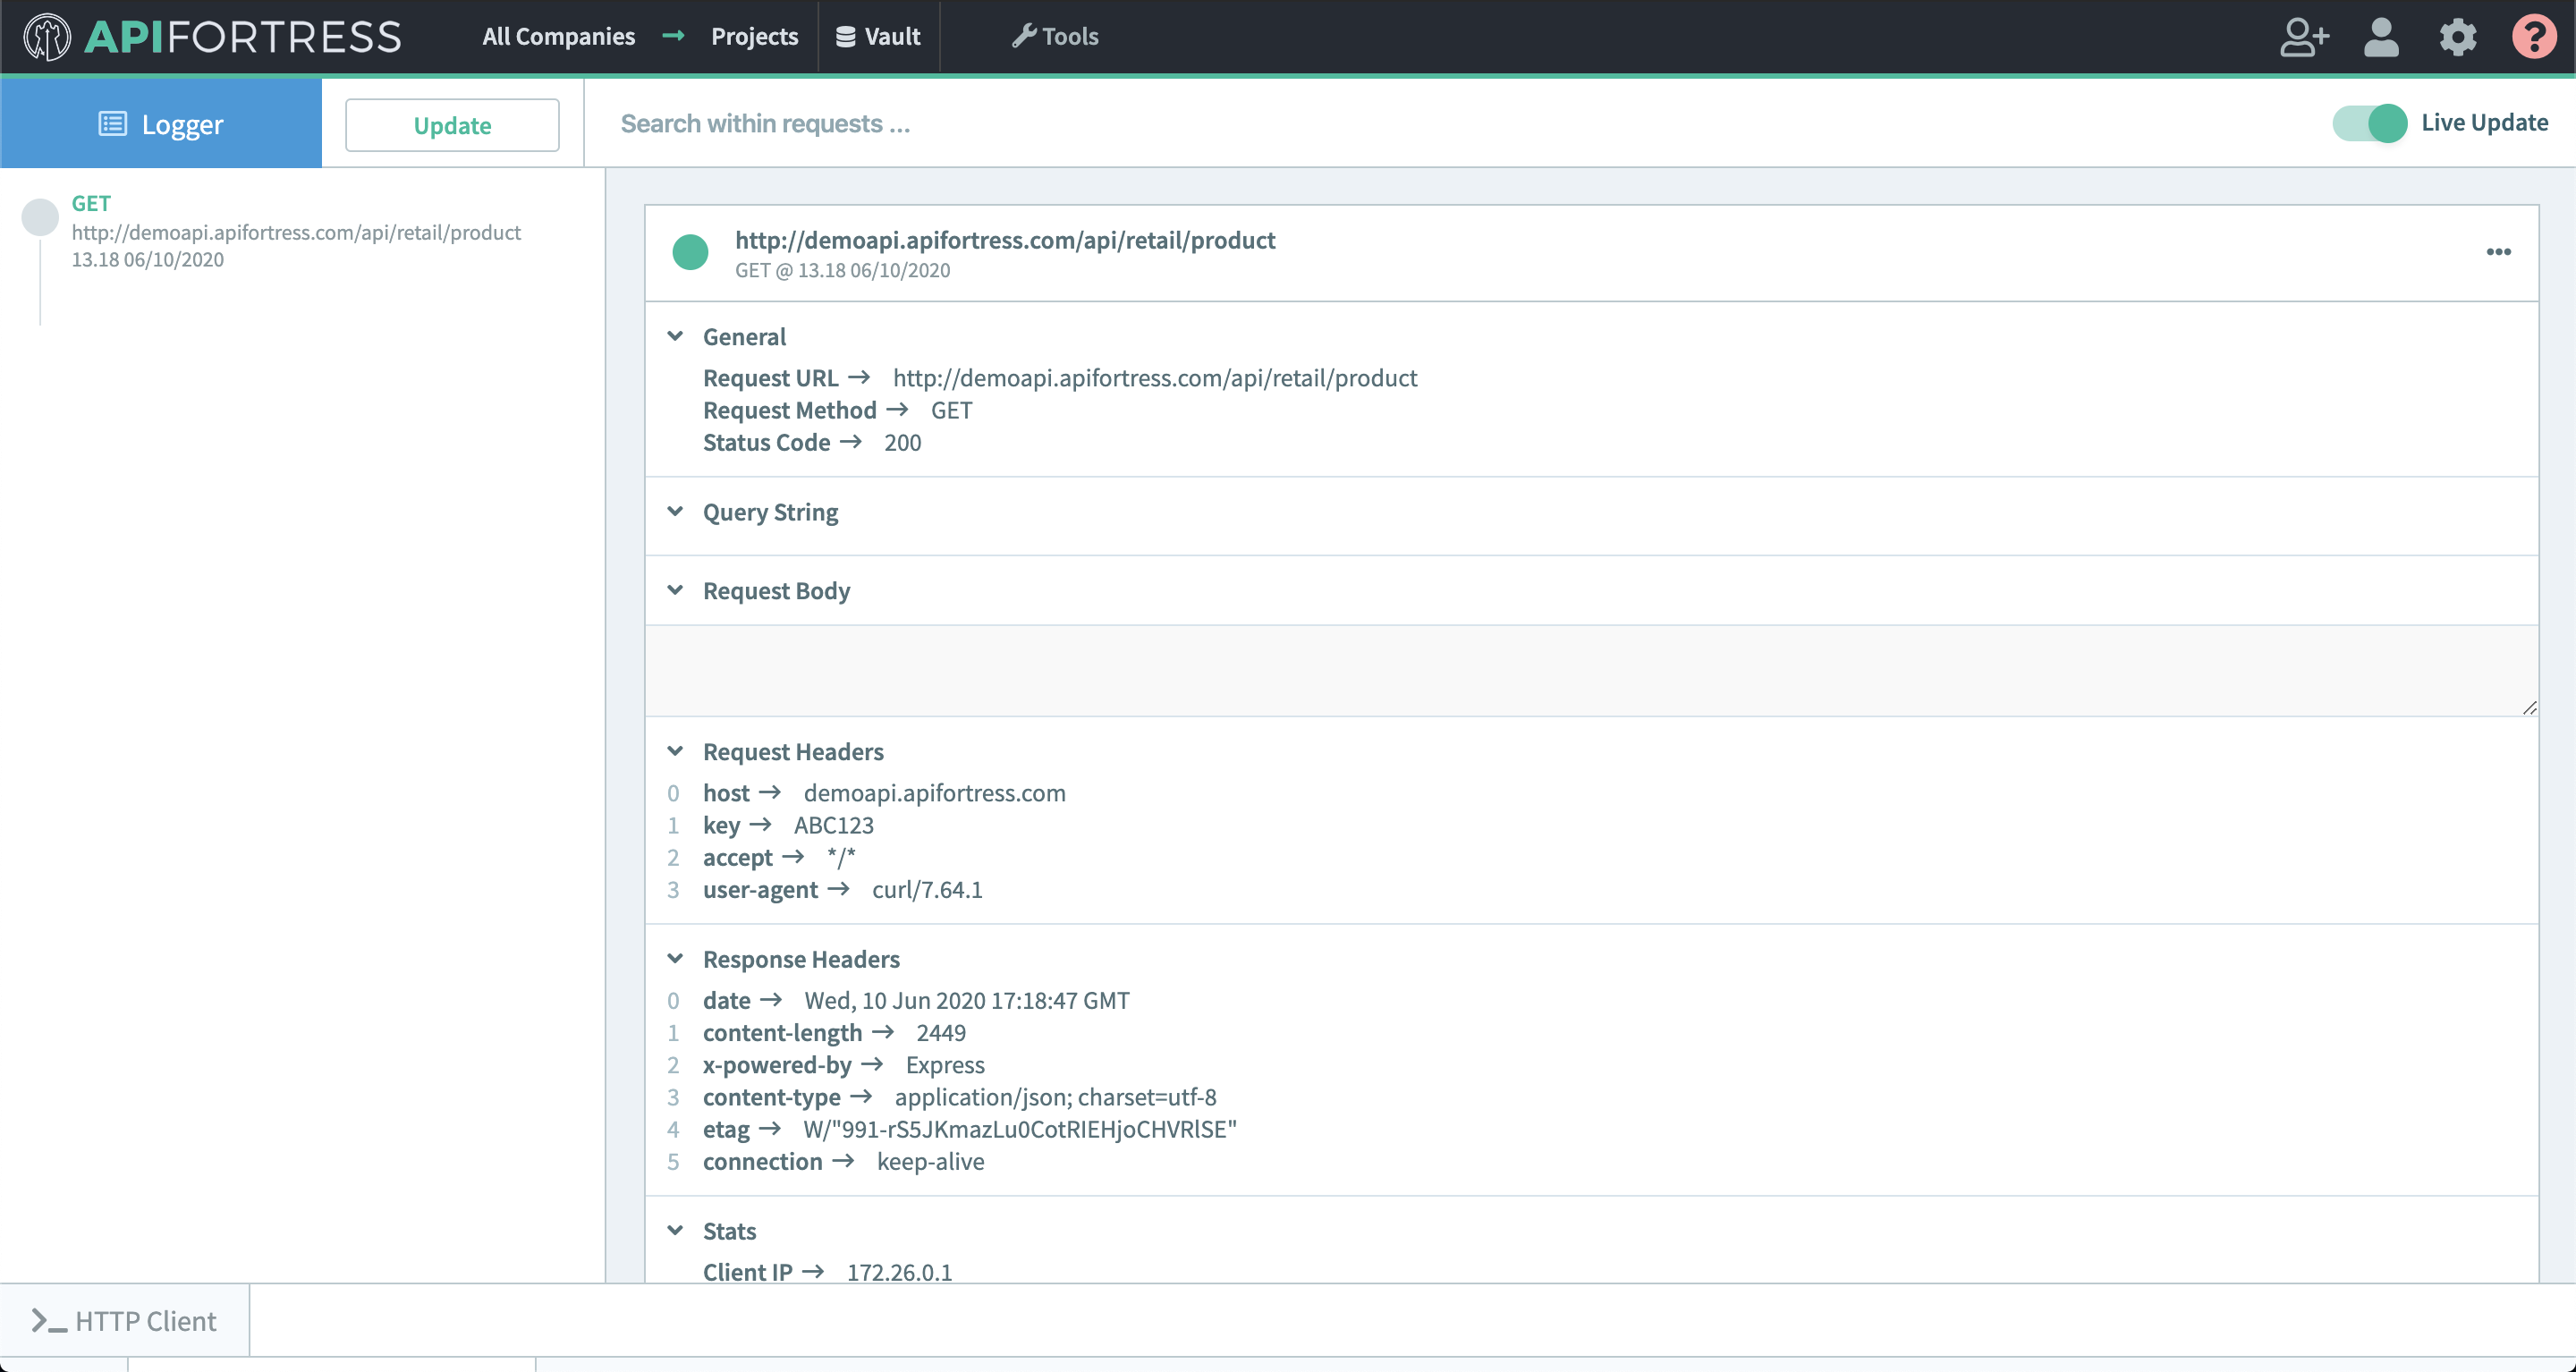
  2. Access your API Fortress Logger by going to “Tools -> Logger” and click “Update”
  3. Execute the following request: curl -H 'key:ABC123' 127.0.0.1:8080/demo/retail/product
  4. The output of the proxied API should appear on your screen
  5. Click “Update” on your API Fortress Logger again and notice the forwarded API conversation

08_Expressions

Bloodhound – Expressions

In Bloodhound actors configuration, you may find fields allowing dynamic expressions. These expressions get evaluated to generate a dynamic value.

SpEL – Spring Expression Language

The language used by Bloodhound is the Spring Expression Language.

Uses in Bloodhound

All of expressions will make use of the current message being processed. The message is accessible using the #msg keyword.

Here’s a breakdown of many internal members, accessed using SpEL.

#msg: the current message;

#msg.request(): the request object;

#msg.request().getHeader('key'): returns a certain request header;

#msg.request().payload(): the request payload, in the form of an array of bytes;

#msg.request().callId(): the call id, as defined by the EndpointIdentifierActor

#msg.response(): when evaluating a message after the upstream phase, this expression will access the response object;

#msg.response().getHeader('key'): returns a certain response header;

#msg.response().payload(): the response payload, in the form of an array of bytes;

#msg.meta(): the metadata map;

#msg.meta().getOrElse('key','defaultValue'): returns the value of the metadata identified by the key. ‘defaultValue’ in case the metadata does not exist

07_Module Actors

Bloodhound – Modules Actors

Bloodhound can include external modules created for it. As a default, the Docker distribution comes with some of these modules prepackaged, we will be listing them here.

The source code of these modules can be found in this GitHub Repository.

Module: JDBC

Reference: Bloodhound JDBC Module

Module: MongoDB

Reference: Bloodhound MongoDB Module

Module: RabbitMQ

Reference: Bloodhound RabbitMQ Module

Module: Fortress-Forwarder

Reference: Bloodhound Fortress Forwarder Module

06_Advanced Actors

Bloodhound – Advanced actors

Type: Transformers

ReplaceUpstreamActor

Replaces the upstream base URL if a certain condition is verified.

class: com.apifortress.afthem.actors.transformers.ReplaceUpstreamActor

sidecars: yes

config:

  • expression: a SpEL expression returning a boolean. The condition to be matched
  • upstream: the new upstream base URL

EndpointIdentifierActor

Labels the current request based on certain factors. The label is then stored within the request in a variable named callId. The use of this actor is to identify calls and take subsequent actions based on the findings.

class: com.apifortress.afthem.actors.transformers.EndpointIdentifierActor

config:

The configuration looks like the following.

regex:
    [label1]:
        url: [pattern]
        method: [method] 
    [label2]:
        url: [pattern]
        method: [method]
    
  • label: the label to assign
  • url: the regex to identify the URL
  • method (optional): the method of the call

TransformPayloadActor

Alters a textual payload in a message. If the transformer is placed before an Upstream actor, it modifies the request payload. If after, it modifies the response payload.

class: com.apifortress.afthem.actors.transformers.TransformPayloadActor

sidecars: yes

config:

  • set: sets the payload with the given value
  • replace: replaces all the substrings matching a certain regular expression with the provided string. Example:
      replace:
        regex: foo
        value: bar

DeserializerActor

Deserialize data coming in form of string or array of bytes, to data structures (maps, arrays). The output of this operation is then stored into a meta.

class: com.apifortress.afthem.actors.transformers.DeserializerActor

sidecars: yes

config:

  • expression: a path to the piece of data you wish to deserialize. For example #msg.request().payload() is the path to the request payload
  • contentType: the expected content type of the inbound data
  • meta: the key of the meta that will store the result of the deserialization

AddMetaActor

Adds a piece of meta information in the message.

class: com.apifortress.afthem.actors.transformers.AddMetaActor

sidecars: yes

config:

  • name: the key of the meta
  • value: the value of the meta. If evaluated is set to true, it can be a dynamic expression
  • evaluated: true if you need the value to be evaluated

Type: Filters

ApiKeyFilterActor

Filters out any request that does not carry a valid API key in the headers or in the query string. This base actor loads the API keys from a YAML file.

When the API key is recognized, the ApiKey object is stored in the key meta of the request.

class: com.apifortress.afthem.actors.filters.ApiKeyFilterActor

sidecars: yes

config:

  • filename: path to a file containing the API keys
  • in: either query (expecting the key in the query string) or header (expecting the key in the headers)
  • name: key of the field carrying the API key

The file format looks like the following:

api_keys:
  - api_key: ABC123
    app_id: John Doe
    enabled: true
  - api_key: DEF456
    app_id: Jane Doe
    enabled: true

BasicAuthFilterActor

Filters out any request that does not carry a valid basic authentication header. The valid users are stored in an htpasswd (md5, apr1) compatible file.

When the authentication succeeds, the username is stored in the user meta of the request.

class: com.apifortress.afthem.actors.filters.BasicAuthFilterActor

sidecars: yes

config:

  • filename: path to a htpasswd-compatible file

ThrottlingActor

Limits the number of requests/second the gateway will accept and pass through. Multiple counting buckets are present.

class: com.apifortress.afthem.actors.filters.ThrottlingActor

sidecars: yes

config:

  • global: (int) the maximum number of requests per second globally for this flow
  • app_id: (int) maximum number of requests per second per App ID (as defined by API keys)
  • ip_address: (int) maximum number of requests per second per requesting IP address

Read more about Bloodhound Modules

05_Fine Tuning

Bloodhound – Fine Tuning

Bloodhound can be fine tuned for your needs. This ability comes with the price of complexity, so it is important to understand the inner mechanisms before modifying the configuration files.

Actors

The implementers.yml file defines which actors need to be instantiated, as in:

  - id: request
    class: com.apifortress.afthem.actors.proxy.RequestActor
    type: proxy

An actor instance can do one thing at a time, and if new tasks come up as it’s involved in a task, the new inbound tasks get queued in a “mailbox”. The actor will proceed with the next task when available.

You can clearly declare multiple actors of the same type in implementers.yml, using different IDs, and in that case the actors will be completely distinct and will need to be explicitly referenced.

ie:

  - id: transform_headers_1
    class: com.apifortress.afthem.actors.transformers.TransformHeadersActor
    type: transformer
  - id: transform_headers_2
    class: com.apifortress.afthem.actors.transformers.TransformHeadersActor
    type: transformer

This is useful if you need to proxy completely different APIs, and you want to make sure they will not interfere one with the other. In that case you will use transformer/transform_headers_1 in one flow, and transformer/transform_headers_2 in another flow.

A single actor implementer, however, can have a multiplicity. In other words, one ID in the implementers.yml file could represent a team of actors of the same type, sharing the effort in parallel and share the same mailbox. This allows a step in the sequence to be served by multiple actors, and ideally, speed up the process. This is important, for example, when a step is CPU-intensive. As in:

  - id: request
    class: com.apifortress.afthem.actors.proxy.RequestActor
    type: proxy
    instances: 3

Notice the instances keyword.

Thread pools

Actors, as previously said, could allow you to work in parallel, but actors need tools to do so. The tools are the threads. Threads are expensive both in terms of memory and CPU so you don’t want to spawn too many. Bloodhound gives you the option to decide how the system resources need to be utilized with great detail.

In the implementers.yml file, the thread_pools section allows you to create pools of threads that can be assigned to actors.

thread_pools:
  default:
    min: 1
    max: 2
    factor: 1
  computational:
    min: 2
    max: 2
    factor: 2

min is the minimum number of threads created for this thread pool.

max is the maximum number of threads created for this thread pool (the threads exceeding min get decommissioned when not in use)

factor is a multiplier that depends on the server Bloodhound is operating on and it works like this factor*cpu=n_of_threads. A way to make the system more adaptive to the context.

The default thread pool is used when no pool is assigned to an implementer. To assign a specific thread pool, update the implementer like so:

  - id: header_filter
    class: com.apifortress.afthem.actors.filters.FilterActor
    type: filter
    instances: 2
    thread_pool: computational

Thread pools can be assigned to a specific implementer or to multiple implementers. This is crucial because a good balance strongly reduces resource waste. In etc.simplest, for example, two instances of header_filter and two instances of transform_headers share a single pool with 2 threads max. This means that at most, 2 filter operations OR 2 transformation operations OR 1 filter and 1 transformation operations can happen at the same time.

HTTP Client configuration

The HTTP Client is the component that will perform the call from Bloodhound to the upstreams. The client, one for the whole application, can be fine tuned based on your knowledge of your use case. The configuration of these aspects happen in the application.properties file.

httpclient.max_threads: number of I/O dispatchers thread to be created and reserved to the HTTP Client;

httpclient.idle_timeout_seconds: number of seconds before an idle open connection needs to be considered stale and candidate for removal;

httpclient.max_connections: max number of open connections the system should be able to keep up, before it starts dropping some;

This is complicated!

Indeed. But if you understand how this can help you, good things will happen.

Think about this:

Actors are about how many tasks can potentially be executed at the same time, but also how things will line up. A team of actors (instead of just one) make so that if a task is taking longer than expected, the tasks lining up will get assigned to the other actors of the team and not wait forever.

Threads, instead, are about how you want to assign the resources of your system to the actors.

04_Load Balancing

Bloodhound – Backends – Load balancing

Bloodhound has a simple load balancing capability we are going to discuss now. Before moving forward, make sure you have read the basic configuration guide.

The backends in the backends.yml can alternatively be expressed as follows:

- prefix: '[^/]*/upstreams'
  upstreams:
    urls:
    - 'https://server-1/endpoint'
    - 'https://server-2/endpoint'
    probe:
      count_up: 2
      count_down: 2
      method: GET
      timeout: 2 seconds
      path: ''
      status: 200
      interval: 10 seconds
  flow_id: default

In this configuration, upstream is replaced by the upstreams object.

urls: a list of URLs that will be used as upstreams

probe: the system will probe each URL periodically to make sure they are available. The probe is optional and, if omitted, Bloodhound will always considers URLs as functional.

  • path: an extra path segment to be appeneded to the URL when probing
  • count_up: how many times a probe should be successful before the URL can be considered as working
  • count_down: how many times a probe should fail before the URL can be considered as non working
  • method: which method, among GET/POST/PUT/PATCH needs to be used by the probe
  • timeout: how long should a probe wait for a reply before it considers the URL as non responsive and therefore call it a failure
  • status: the expected status code
  • interval: how frequently should the probe run

Notes

The system will look for a probe thread pool in the implementers.yml file. If no probe thread pool is defined, default will be used. Please refer to the fine tuning guide to learn more.

03_Base Actors

Bloodhound – base actors

Type: Proxy

RequestActor

This is a special actor and needs to be instantiated with the special id proxy/request

class: com.apifortress.afthem.actors.proxy.RequestActor

sidecars: yes

config:

  • discard_headers: a list of request header names that need to be discarded immediately

UpstreamHttpActor

The default upstream actor.

class: com.apifortress.afthem.actors.proxy.UpstreamHttpActor

sidcars: yes

config:

  • connect_timeout: timeout for the connection process in milliseconds
  • socket_timeout: timeout for silent socket in milliseconds
  • redirects_enabled: set to true if you want Bloodhound to resolve redirects instead of forwarding to the client
  • max_redirects: if redirects are enabled, maximum number of redirects before giving up
  • discard_headers: a list of response header names that need to be discarded immediately

UpstreamFileActor

An upstream actor that pulls content from text files.

class: com.apifortress.afthem.actors.proxy.UpstreamFileActor

sidecars: yes

config:

  • basepath: path to the files directory. The file name needs to be provided in the request url

SendBackActor

An actor taking care of performing the final checks, packaging and sending back the content.

class: com.apifortress.afthem.actors.proxy.SendBackActor

sidecars: yes


Type: Sidecar

AccessLoggerActor

A logger actor meant to log both inbound and outbound calls. The behavior of the logging activity is managed by the etc/logback.xml file.

class: com.apifortress.afthem.actors.sidecars.AccessLoggerActor

sidecars: no

GenericLoggerActor

A logger to be used in a flow to log certain facts, determined by the user. The behavior of the logging activity is managed by the etc/logback.xml file.

class: com.apifortress.afthem.actors.sidecars.GenericLoggerActor

sidecars: no

config:

  • value: the content to be logged

  • evaluated: if set to true, the value field will be interpreted as a SpEL script. The message is accessible via the msg variable.

FileAppenderSerializerActor

Serializes a full API conversation to JSON and appends it to a file.

class: com.apifortress.afthem.actors.sidecars.serializers.FileAppenderSerializerActor

sidecars: no

config:

  • filename: name of the file
  • disable_on_header: if the provided header is present in the request, then the conversation will skip serialization
  • enable_on_header: if the provided header is present in the request, then the conversation will be serialized
  • discard_request_headers: list of request headers that should not appear in the serialized conversation
  • discard_response_headers: list of response headers that should not appear in the serialized conversation
  • allow_content_types: full or partial response content types which make the request eligible for serialization. If the list is null or empty, all content types will be accepted

Type: Transformer

TransformHeadersActor

Alters the headers of a message. If the transformer is placed before an Upstream actor, it modifies the request headers. If after, it modifies the response headers.

class: com.apifortress.afthem.actors.transformers.TransformHeadersActor

config:

  • add: adds a header. If evaluated is set to ŧrue, the value is treated as a SpEL script. Example:
      add:
        - name: header_name
          value: header_value
          evaluated: false
    
  • remove: removes a header. Example:
      remove:
        - name: header_name
    
  • set: sets the value of an existing header, or adds it if the header is not present. If evaluated is set to ŧrue, the value is treated as a SpEL script. Example:
    set:
      - name: header_name
        value: header_value
        evaluated: false
      

Type: Filter

FilterActor

Filters out any request not matching a certain set of criteria.

class: com.apifortress.afthem.actors.filters.FilterActor

sidecars: yes

config:

  • accept: a list of conditions. If verified, the message will be accepted. Example:
     accept:
       - value: "#msg.request().getHeader('accept')=='application/json'"
         evaluated: true
       - value: "#msg.request().getHeader('key')=='ABC123'"
         evaluated: true  
    Just like previous filters, if evaluated is true,value will be evaluated as SpEL script.
  • reject: a list of conditions. If verified, the message will be rejected. Example:
    reject:
      - value: "#msg.request().method()!='GET'"
        evaluated: true

Documentation for more advanced actors

02_Flows

Bloodhound – flows

In the default configuration module, flows are files located in the etc/flows directory.

Anatomy of a flow

A flow is a number of steps (actors) that will be performed between the inbound request and the response to the outbound request. Some of which are meant to work in a sequence, and some in parallel.

In order to use an actor, its implementation needs to be defined among the implementers. In the default configuration mode, this happens in the implementers.yml file.

There are 3 essential actors a flow cannot do without and are required in every flow:

  • A request-parsing step, explicitly named proxy/request;
  • An upstream step, performing the actual call to the upstream;
  • A send-back step, returning the retrieved content to the user;

With the exception of proxy/request, naming is free, as well as implementations, but the structure needs to follow the <type>/<name> pattern.

Each step has a set of fixed instructions and extra fields.

  • The key is a combination of the type and the ID, declared in the implementers.yml file
  • next determines what’s the next actor in the flow
  • sidecars (not always applicable) are the IDs of actors that will receive a copy of the message in parallel but do not alter the main message. Mind that sidecars can have different behaviors based on where they’re placed in the flow. For example, access loggers log inbound calls when placed before the SendBack, and outbound calls when placed after the SendBack
  • config other implementation-specific configuration keys

If a certain actor is referenced either as next or in sidecars, it must to be present in the flow.

Example:

proxy/request:
  next: filter/header_filter
  sidecars:
    - sidecar/access_logger

filter/header_filter:
  next: proxy/upstream_http
  sidecars:
    - sidecar/access_logger
  config:
    accept:
      - value: "#msg.request().getHeader('key')=='ABC123'"
        evaluated: true
      - value: "#msg.request().getHeader('accept')=='application/json'"
        evaluated: true
    reject:
      - value: "#msg.request().method()!='GET'"
        evaluated: true

proxy/upstream_http:
  next: proxy/send_back

proxy/send_back:
  sidecars:
    - sidecar/access_logger

sidecar/access_logger:
  config: {}

01_Basic Configuration

Bloodhound – Basic configuration

The default Bloodhound configuration module is file driven. All configuration files are located in the etc directory.

System configuration

bloodhound.yml

The config_loader section describes which configuration loading mechanism needs to be used. Modules can be created to store and load configuration in other locations and systems, such as databases.

The mime.text_content_types_contain array contains a list of substrings meant to help the system detecting which content types are meant to represent textual content.

application.properties

logging.config=etc/logback.xml describes where the logging configuration file is located.

server.port tells the Bloodhound web server which port it should bind to (default is 8080)

server.compression.enabled true if the web server needs to compress its output (default is false)

server.compression.mime-types a comma-separated list of mime types that should undergo compression

server.compression.min-response-size the smallest stream of that should trigger compression

server.ssl.key-store-type to configure secure connections, the key-store type (default is PKCS12)

server.ssl.key-store the location of the key-store in the file system

server.ssl.key-store-password the password of the key-store

See Fine tuning for more settings.

ehcache.xml

Certain operations may require some short lived caching. This is where that caching happens.

configs is a cache meant to store the system configuration, so that it doesn’t need to be read multiple times in a short period of time.

expressions is a cache meant to store the interpreted version of Spring SpEL scripts.

api_keys is a cache used by the default ApiKeysFilterActor to store API keys in memory.

http_routers is a cache used by the load-balancing functionality

New caches can be introduced to support other modules if necessary.

logback.xml

The configuration of the logging system.

Proxy configuration

implementers.yml

This is where all actors involved in flows get listed and configured. If an actor is going to be used in a flow, it needs to appear here.

A typical implementer is configured like this:

  - id: request
    class: com.apifortress.Bloodhound.actors.proxy.RequestActor
    type: proxy
    instances: 2

id the ID of the actor

class the class implementing the actor

type a type among proxy filter transformer and sidecar

instances (optional) the number of instances of the actor to be instantiated

thread_pool (optional) the name of the thread pool assigned to this actor

This file also defines thread pools in the thread_pools section. Thread pools describe pools of threads to be assigned to actors. A typical thread pool looks like this:

  default:
    min: 1
    max: 2
    factor: 1

The key of the thread pool (in this case default) is a single word that identifies the thread pool. A default thread pool is always required.

min is the minimum number of threads created for this thread pool.

max is the maximum number of threads created for this thread pool (the threads exceeding min get decommissioned when not in use)

factor is a multiplier that depends on the server Bloodhound is operating on and it works like this factor*cpu=n_of_threads. A way to make the system more adaptive to the context.

Check out the Fine Tuning Guide for further readings on this topic.

backends.yml

This file connects the inbound requests to the outbound destinations.

A typicial backend looks like this:

- prefix: '127.0.0.1/any'
  upstream: 'https://httpbin.org/anything'
  flow_id: default

prefix how the inbound request will look like, without protocol and port.

upstream where to send the request to. If this field is omitted, the full request URL will be used (useful in conjunction with a forward proxy)

flow_id which flow needs to be used.

Everything exceeding prefix on the right side will be passed over to the upstream. In this example if I send a request to http://127.0.0.1:8080/any/whatever it will be forwarded to https://httpbin.org/anything/whatever

Optionally, a headers filter can also be applied. For example:

- prefix: '[^/]*/only/with/header'
  headers:
    x-my-header: anything
  upstream: 'https://httpbin.org/anything'
  flow_id: default

- prefix: '[^/]*/only/with/header'
  headers:
    x-my-header: mastiff
  upstream: 'https://mastiff.apifortress.com/app/api/rest/relay'
  flow_id: default

If the x-my-header header is present and is equal to anything, the first configuration will be chosen. If the given header is equal to mastiff, the second configuration will be chosen.

It is also possible to pass extra meta-variables to the flow when a specific flow is picked up. For example:

- prefix: '[^/]*/with/meta'
  meta:
    special_var: my_meta
  upstream: 'https://httpbin.org/anything'
  flow_id: default

The meta variables can be retrieved in evaluated fields by using the following syntax:

#msg.meta().get('special_var').get()

Furthermore, a load balancing functionality is available. Please refer to the load balancing guide.

Flows

Flows are discussed in the Flows guide